Validate XML Request Against XML Schema in Mule 4
In this article, we are going to configure an XML module in a Mule application to validate XML payloads using XML schema (XSD) and handle any errors.
Join the DZone community and get the full member experience.
Join For FreeIn the world of integration and data exchange, XML (eXtensible Markup Language) continues to play a crucial role due to its flexibility and widespread adoption. However, to ensure seamless communication between different systems, validating XML data against predefined rules becomes essential. In this article, we will explore the process of validating XML requests against XML Schema in Mule 4.
The steps involved in validating XML schema in Mule 4 are as follows:
- Create a Mule project
- Define an XML schema
- Add schema to the project
- Add and configure the XML validation module
- Perform data validation
- Handle validation results
Before We Start, Let’s Understand What XML Schema Is
XML schema, also known as XSD (XML Schema Definition), is written in XML format and includes elements and attributes that describe the structure of the XML data. It serves as a set of rules or constraints defining the allowed elements, attributes, and relationships in an XML document.
XML schema is used to ensure data consistency and validation in XML-based systems. XML Schema provides a standardized way to define the structure of XML documents, making it easier to share and understand the data requirements across different applications.
Use Case: XML Schema Validation:
XML Payload
<root>
<success>true</success>
<message>XML schema validated</message>
<number>1234</number>
</root>
For this tutorial, we will pass the above payload with a POST request to the /xml endpoint and validate it using an XML schema.
I have created a demo project with /json endpoint and /xml endpoint for JSON and XML validation, respectively. In this tutorial, we will use the /xml endpoint.

For XML validation, we will use xml-validation-flow with /xml endpoint. Before configuring the validation module, if we make a call to /xml endpoint with the above XML payload, it gives a 200 status code with a success message.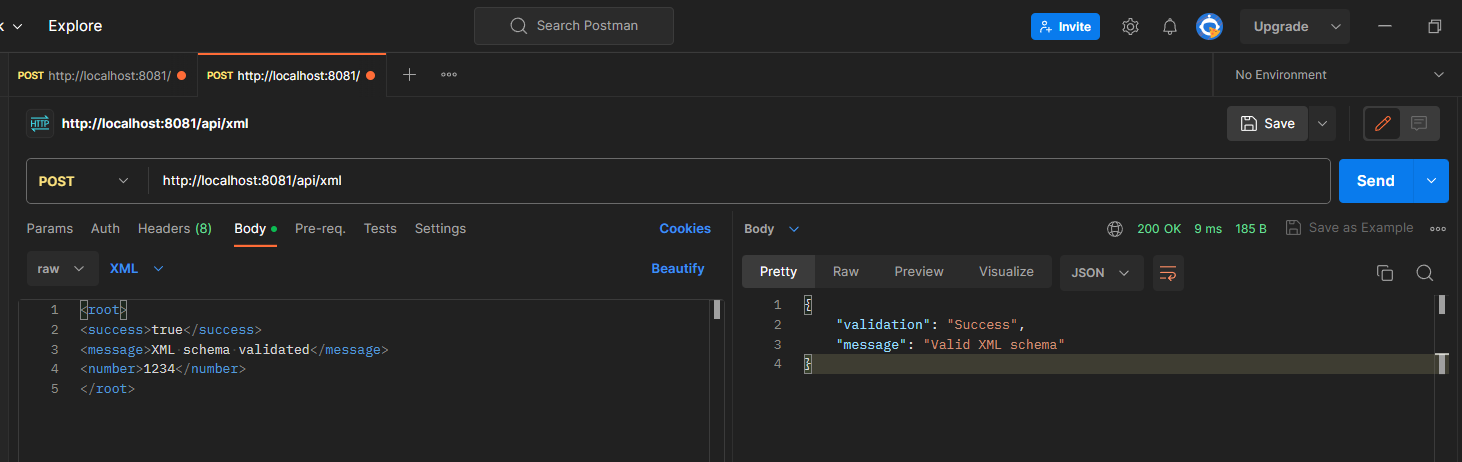
Steps To Validate the Payload Against XML Schema:
Step 1: Add the XML module to the project in the studio from Anypoint Exchange.

Verify whether the XML module has been added or not.

Step 2: Prepare the XML schema. For creating the XML schema, you can use any free online XML to XML schema generator tool available. (For this tutorial, I have used this one).
Select the XML to XSD from the left side menu.

In the schema generator, add the payload and generate the schema.

Generated Schema for the above XML payload:
<?xml version="1.0" encoding="utf-8"?>
<!-- Created with Liquid Technologies Online Tools 1.0 (https://www.liquid-technologies.com) -->
<xs:schema attributeFormDefault="unqualified" elementFormDefault="qualified" xmlns:xs="http://www.w3.org/2001/XMLSchema">
<xs:element name="root">
<xs:complexType>
<xs:sequence>
<xs:element name="success" type="xs:boolean" />
<xs:element name="message" type="xs:string" />
<xs:element name="number" type="xs:unsignedShort" />
</xs:sequence>
</xs:complexType>
</xs:element>
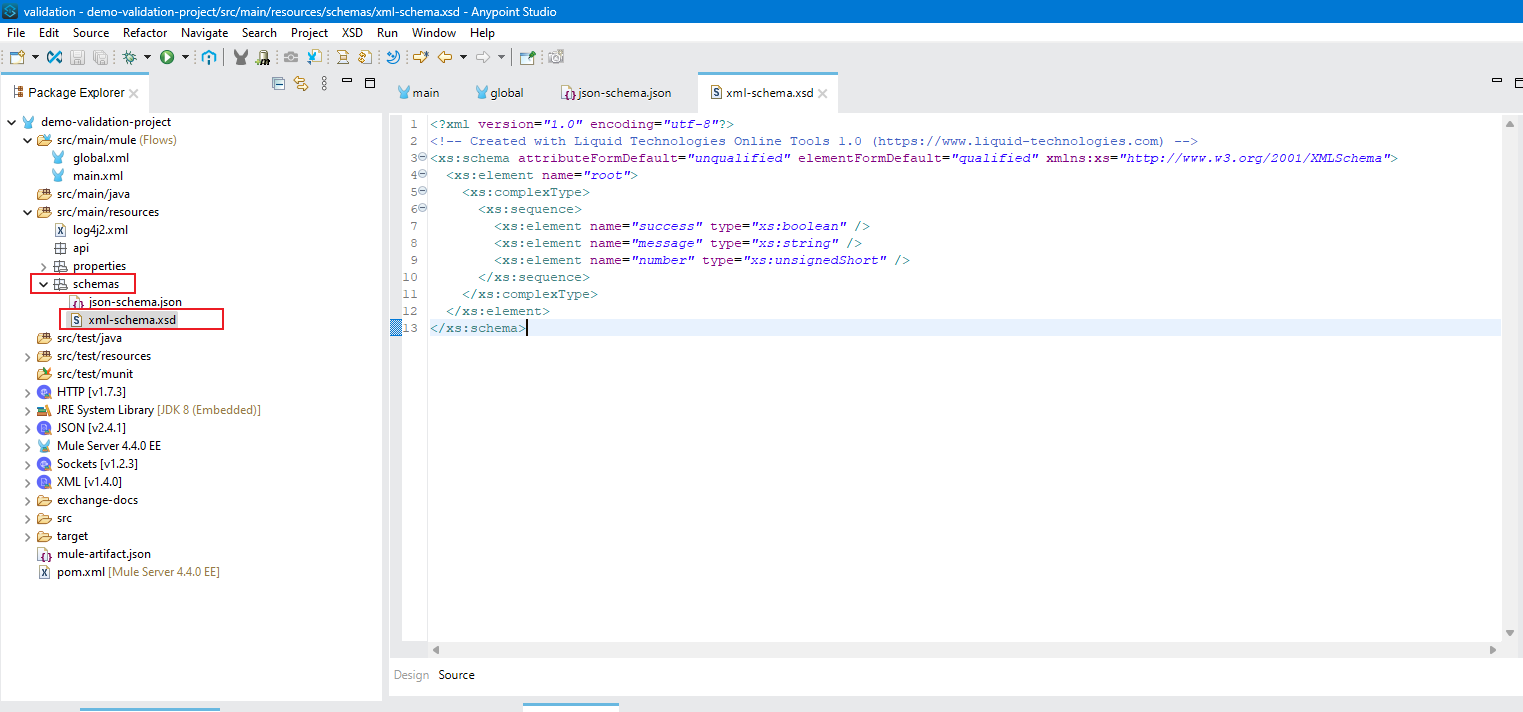
</xs:schema>Step 3: In the project's "src/main/resources" folder, create a folder with the name "schemas" (or any name you prefer). Create a file with the name "xml-schema.xsd" inside the "schemas" folder.
Note: Make sure that the file type of the XML schema is ".xsd."
Step 4: Copy and paste the generated XML schema to the "xml-schema.xsd" file.
Step 5: Add the XML "Validate schema" processor before the "Transform Message" (or any other processor which needs the validated XML data).
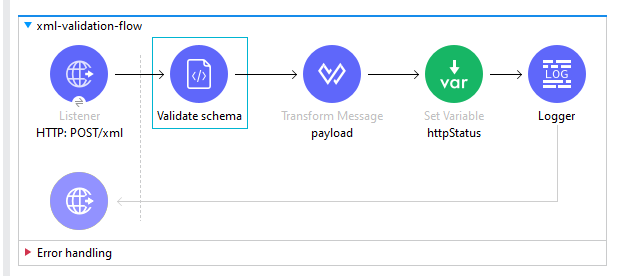
Configure the XML schema path in the "Validate schema" processor.

Step 6: In the "Error handling" section, add an "On Error Propagate" scope and set the type to "XML-MODULE:SCHEMA_NOT_HONOURED" error type.

Step 7: Add the "httpStatus" variable and error message in the error handler. (In this tutorial, I have set the "httpStatus" to 400 for error response).

Step 8: Set the httpStatus variable in HTTP Listener as "Status code" in the "Responses" section.

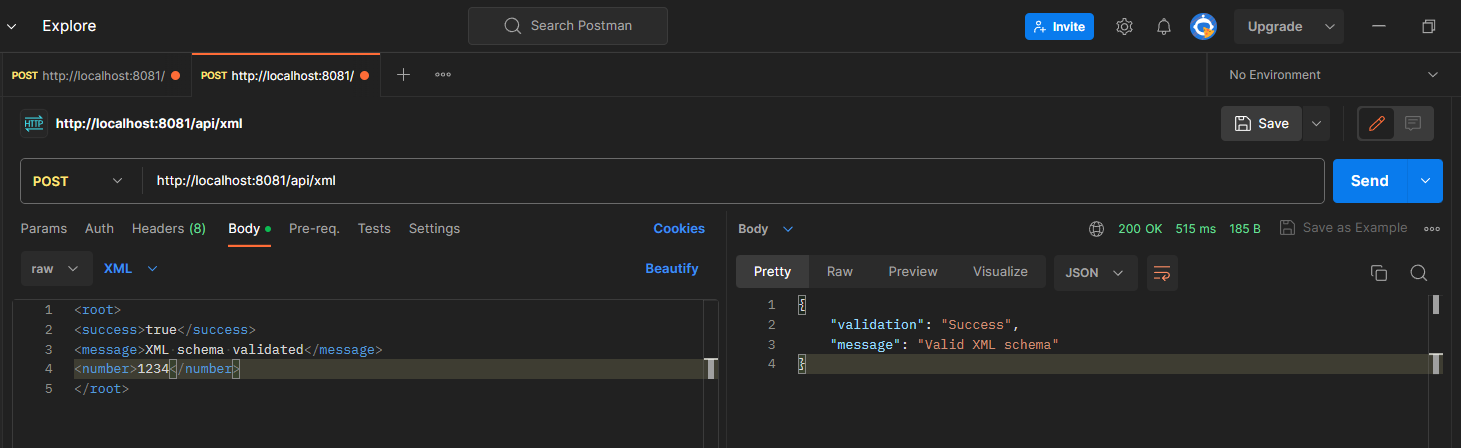
Step 9: Deploy the project and send a valid request to the/xml endpoint. We should get a successful response with a status code of 200.
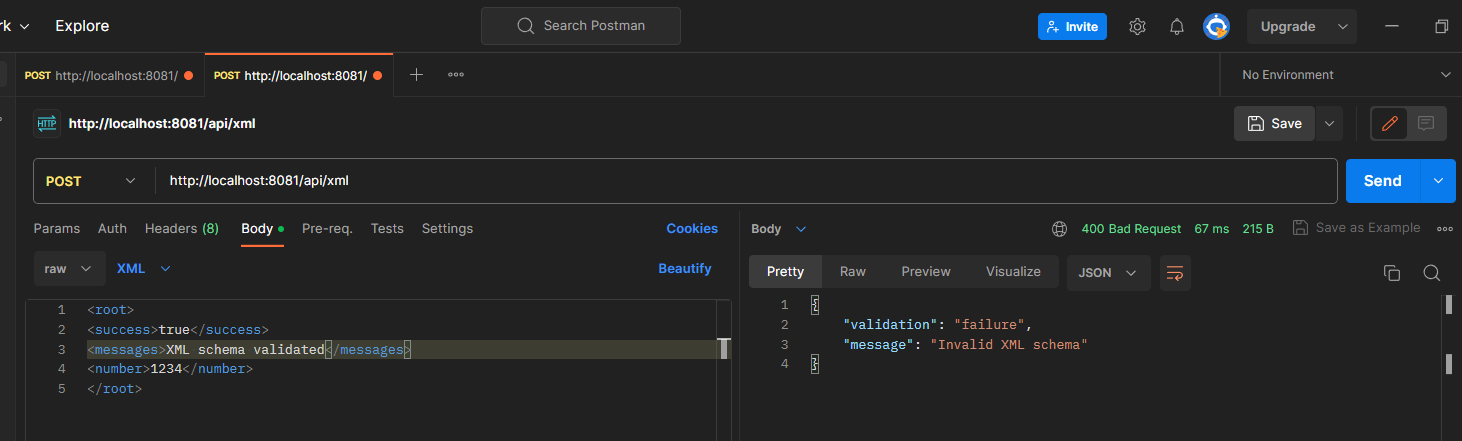
Now, make some changes to the request payload. We should get an error response with a status code of 400. (Here, I changed the "message" field to "messages").
Step 10: At this point, if we pass any extra fields in the XML request body, it will not allow the extra field to pass and will return an error message with 400 as the status code.
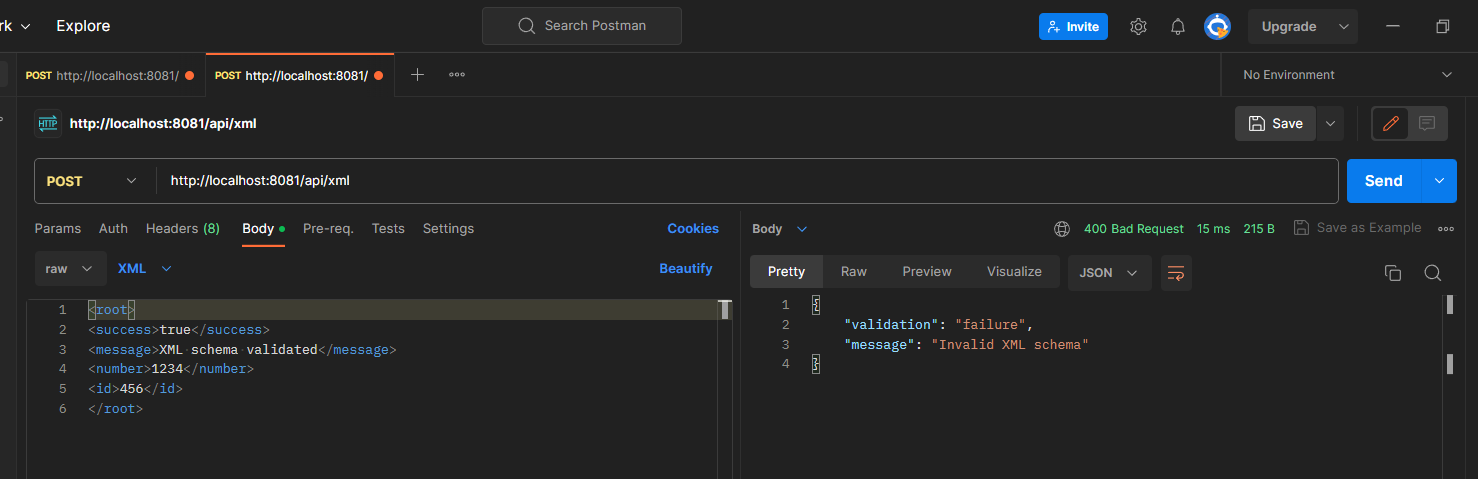
Note: In the above screenshot, the "id" field is extra, we did not define the "id" field in the XML schema, and that's why the request failed.
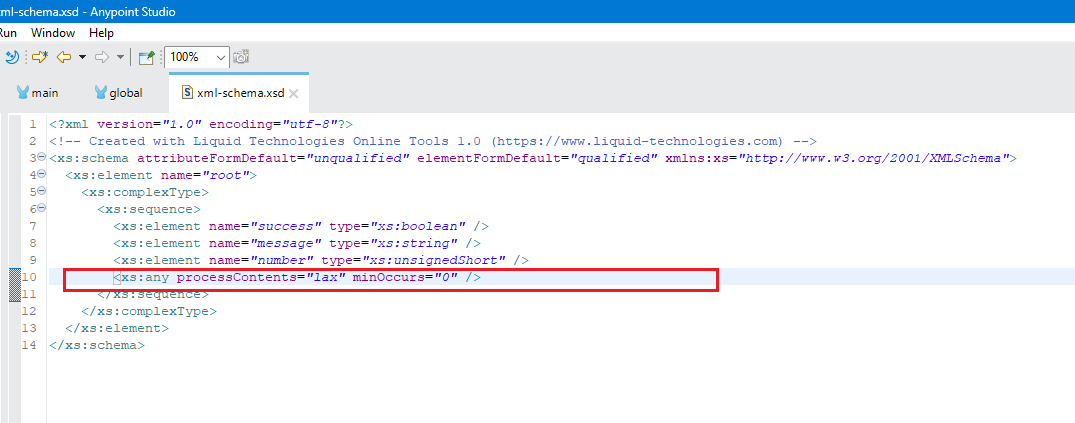
If we want to allow the extra fields that are not defined in the schema, we have to add "<xs:any processContents="lax" minOccurs="0" />" to the schema.
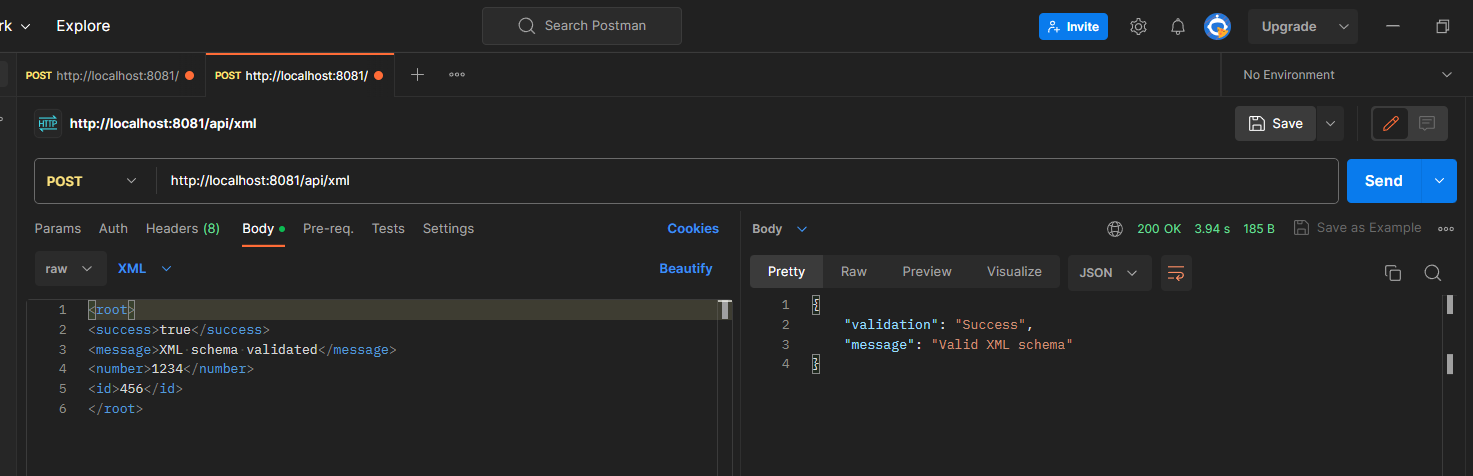
Step 11: Save the schema and redeploy the app. Now make a call to the /xml endpoint with extra fields in the request payload. It should allow the extra field to pass and should return a successful response.
This way, we can validate an XML request payload against an XML schema.
For more information about the XML schema properties, please refer to the documentation here.
You can get the source code of the above application here.
I hope you find this tutorial helpful.
Opinions expressed by DZone contributors are their own.
Comments