Network Configuration for Solaris 11 in VirtualBox
Running into networking trouble when using Solaris and VirtualBox together? Here's how to configure your network in a variety of ways.
Join the DZone community and get the full member experience.
Join For FreeHi all! Recently, I tried Solaris for some tasks at AdroitLogic. Installing Solaris on VirtualBox was not so difficult, and there were quite a few resources on the internet. I referenced this article in the process.
However, for configuring the network, it was not the same. So here, I will note down a few things that I believe might be useful when configuring the network for Solaris 11 in Virtual Box.
In Solaris 11, configuring the network is not merely a task of editing a few files, unlike in most other operating systems. There are a set of commands we can to create those configurations for us.
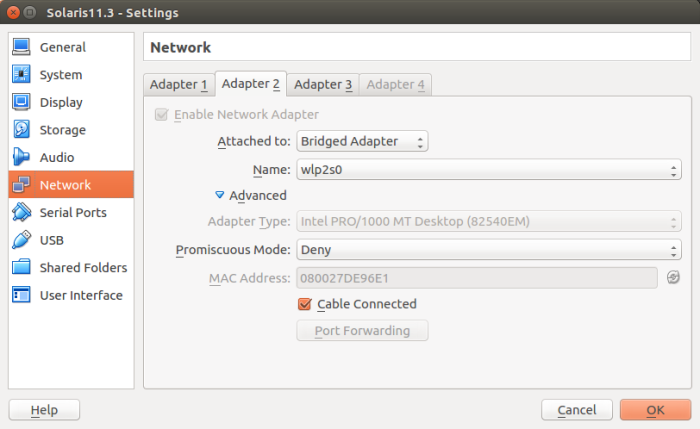
We will go through configuring our NAT, HostOnly, and Bridged Adapters. First, we have to go to Settings for the Solaris VM in VirtualBox and, from there, to the Network Tab.
Even though, eventually, we will add three network adapters, I suggest we start by enabling only one adapter — as it might be hard to figure out which is which one is inside Solaris if we enabled them all at once.
Configuring the Bridged Adapter
So to start, let’s turn on our Bridged Adapter. Make sure you press OK and save the changes. Now start up the VM and log in.
Solaris 11 uses the concept of Network Configuration Profiles (NCP).
1. Automatic – Uses DHCP to obtain network configuration (IP address, router, and DNS) from any of the connected Ethernet interfaces. Does not support hot swapping of interfaces and IPMP.
2. Manual (DefaultFixed NCP) – interfaces need to be manually configured using the dladm and ipadm commands. Also called DefaultFixed NCP. Supports hot swapping of interfaces and IPMP.
We want to use a Manual profile. You can get a list of these with the “netadm list” (network administration) command.
In the above output, we can see “Automatic” is disabled and “DefaultFixed” is online. This is because I already enabled it when installing Solaris. So if you don’t have DefaultFixed online, run the following commands.
netadm disable -p ncp Automatic
netadm enable -p ncp DefaultFixed
Now let’s run the “dladm” (data link administration) command. You will see something similar to the following:
Now we have to create an IP configuration. For that, we use the “ipadm” (IP administration) command.
ipadm create-ip net0Here, net0 is the name I have given for IP configuration. You can use the LINK name you got as the output of “dladm” command.
To continue the configuration we created, the following command can be used.
ipadm create-addr -T static -a local=192.168.1.190/24 net0/v4- -T specifies either the static, DHCP, or addrconf (for IPv6) types of addresses.
- -a specifies the address
- v4 is used to denote IP v4, but it can be any random string used to identify the interface.
Note that as we are configuring the Bridged Adapter, we need a public IP for this interface and we are making it static.
To view the configurations, the following command can be used.
ipadm show-addrThat is about it for the Bridge Adapter configuration.
Configuring Routes
Now we have to configure routes. To view routes, run “route -p -n show”. To add a default route, use this command:
route -p add default 192.168.1.1If you want to delete a mistakenly added route, you can use a command like:
route -p delete default 192.168.1.100Now you should be able to ping to this VM within the network.
Configuring a HostOnly Adapter
Configuring a HostOnly Adapter is similar to configuring the Bridged Adapter. You have to enable that from the VirtualBox setting first, and then, inside the VM, you will be able to identify the newly added data link with the “dladm” command. So you can configure that. The only difference would be that you will have to use an IP in the 192.168.56.xxx range, as it is the default range for VirtualBox HostOnly IPs.
Configuring NAT
Configuring NAT has a slight difference. For NAT, we will be using DHCP, not static. So the command for configuring the IP address is different.
ip-adm create-addr -T dhcp net2/v4Configuring DNS
Adding the DNS name server:
rajind@solaris:~# svccfg -s dns/client
svc:/network/dns/client> setprop config/nameserver = (8.8.8.8 8.8.4.4)
svc:/network/dns/client> listprop config
config                      application
config/value_authorization astring     solaris.smf.value.name-service.dns.client
config/nameserver          net_address 8.8.8.8 8.8.4.4
svc:/network/dns/client> exit
rajind@solaris:~#


rajind@solaris:~# svcadm refresh dns/client
rajind@solaris:~# svcadm restart dns/client
Setting the name service switch:
rajind@solaris:~# svccfg -s name-service/switch
svc:/system/name-service/switch> setprop config/host = "files dns"
svc:/system/name-service/switch> listprop config
config                      application
config/default             astring     files
config/value_authorization astring     solaris.smf.value.name-service.switch
config/printer             astring     "user files"
config/host                astring     "files dns"
svc:/system/name-service/switch> exit
rajind@solaris:~#

rajind@solaris:~# svcadm refresh name-service/switch
rajind@solaris:~# svcadm restart name-service/switch
References
Many thanks to the authors of these blog posts.
- http://thegeekdiary.com/how-to-configure-an-ip-address-in-solaris-11/
- http://thegeekdiary.com/installing-oracle-solaris-11-in-virtualbox/
- https://w3hol.wordpress.com/2011/12/29/setting-static-ip-address-on-solaris-11/
That concludes this post. Cheers!
Call To Action
Originally published at notebookbft.wordpress.com on September 22, 2016.
Opinions expressed by DZone contributors are their own.
Comments