Mule and Jenkins
Learn how Jenkins can be configured for continuous integration of Mule projects using Mule's out-of-the-box Maven plugins.
Join the DZone community and get the full member experience.
Join For FreeMule provides out-of-the-box Maven plugins by means of which one can create a build that is triggered on every project change, and runs all its unit and functional tests automatically. In this article, I am going to show how easy it is to configure Jenkins for continuous integration of Mule projects.
Before We Start
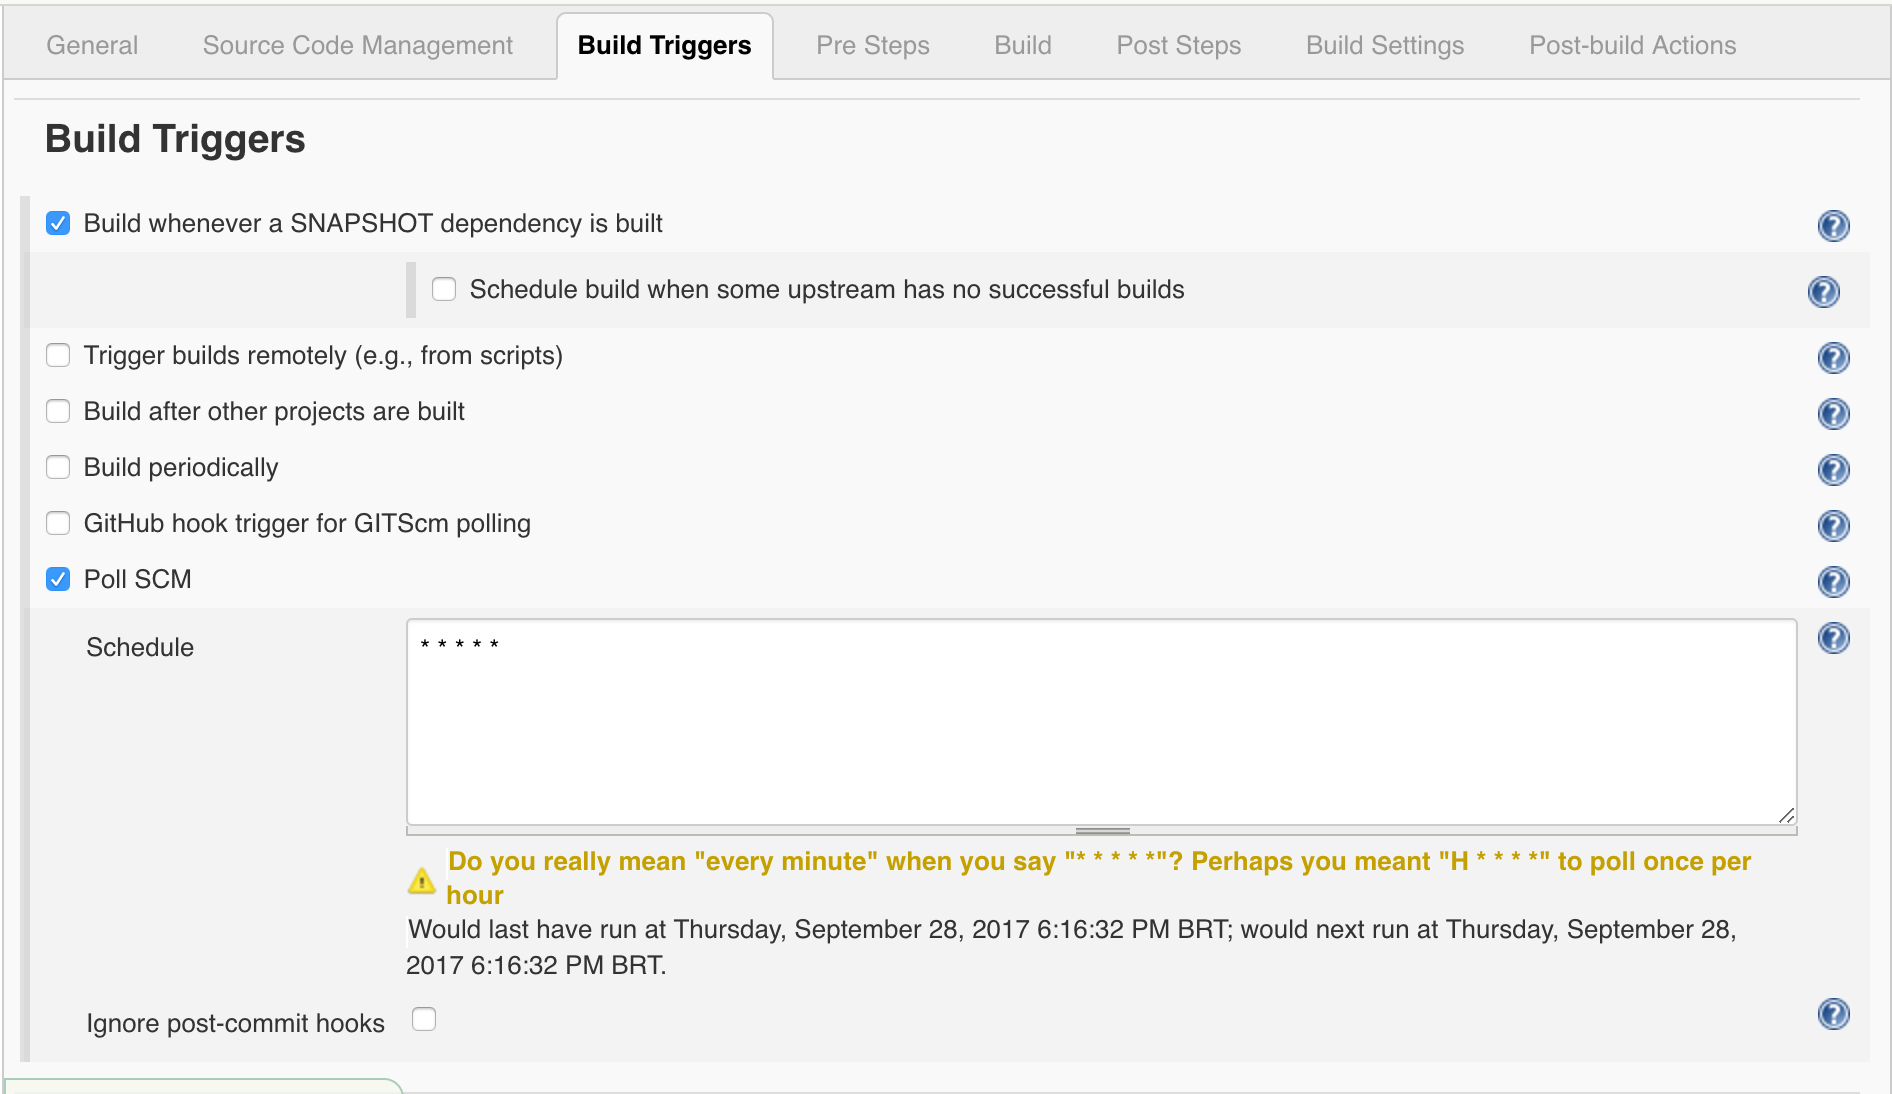
Before we start be sure that you have already installed Jenkins in your system and it's up and running. In this tutorial I have put my conditions as follows. My project is checked-in in bitbucket and Jenkins will poll every minute to check if something new has been pushed to the repository. If it is true it will build the project and deploy it in the Cloudhub.
The Project Structure
The project must be a maven project. For this tutorial I am using a very simple project. Also I have created a property file to provide the following properties.
anypoint.username=YOUR ANYPOINT LOGIN
anypoint.password=YOUR ANYPOINT PASSWORD
anypoint.environment=Sandbox
I am using the properties in the pom.xml of the project. Here is the pom file,
<?xml version="1.0" encoding="UTF-8" standalone="no"?>
<project xmlns="http://maven.apache.org/POM/4.0.0" xmlns:xsi="http://www.w3.org/2001/XMLSchema-instance"
xsi:schemaLocation="http://maven.apache.org/POM/4.0.0 http://maven.apache.org/maven-v4_0_0.xsd">

<modelVersion>4.0.0</modelVersion>
<groupId>com.ac</groupId>
<artifactId>maven-test</artifactId>
<version>1.0.0</version>
<packaging>mule</packaging>
<name>Mule maven-test Application</name>

<properties>
<project.build.sourceEncoding>UTF-8</project.build.sourceEncoding>
<project.reporting.outputEncoding>UTF-8</project.reporting.outputEncoding>

<mule.version>3.8.4</mule.version>
<mule.tools.version>1.2</mule.tools.version>
</properties>

<build>
<plugins>
<plugin>
<groupId>org.mule.tools.maven</groupId>
<artifactId>mule-app-maven-plugin</artifactId>
<version>${mule.tools.version}</version>
<extensions>true</extensions>
<configuration>
<copyToAppsDirectory>true</copyToAppsDirectory>
</configuration>
</plugin>
<plugin>
<groupId>org.codehaus.mojo</groupId>
<artifactId>build-helper-maven-plugin</artifactId>
<version>1.7</version>
<executions>
<execution>
<id>add-resource</id>
<phase>generate-resources</phase>
<goals>
<goal>add-resource</goal>
</goals>
<configuration>
<resources>
<resource>
<directory>src/main/app/</directory>
</resource>
<resource>
<directory>mappings/</directory>
</resource>
</resources>
</configuration>
</execution>
</executions>
</plugin>

<!-- Read property file -->
<plugin>
<groupId>org.codehaus.mojo</groupId>
<artifactId>properties-maven-plugin</artifactId>
<version>1.0.0</version>
<executions>
<execution>
<phase>initialize</phase>
<goals>
<goal>read-project-properties</goal>
</goals>
<configuration>
<files>
<file>src/main/resources/init.properties</file>
</files>
</configuration>
</execution>
</executions>
</plugin>
<!-- Deploy to Cloudhub -->
<plugin>
<groupId>org.mule.tools.maven</groupId>
<artifactId>mule-maven-plugin</artifactId>
<version>2.0</version>
<configuration>
<deploymentType>cloudhub</deploymentType>
<muleVersion>3.8.4</muleVersion>
<username>${anypoint.username}</username>
<password>${anypoint.password}</password>
<redeploy>true</redeploy>
<environment>${anypoint.environment}</environment>
<workerType>Micro</workerType>
</configuration>
<executions>
<execution>
<id>deploy</id>
<phase>deploy</phase>
<goals>
<goal>deploy</goal>
</goals>
</execution>
</executions>
</plugin>
<plugin>
<groupId>org.apache.maven.plugins</groupId>
<artifactId>maven-deploy-plugin</artifactId>
<configuration>
<skip>true</skip>
</configuration>
</plugin>
</plugins>
</build>

<!-- Mule Dependencies -->
<dependencies>


</dependencies>

<repositories>
<repository>
<id>Central</id>
<name>Central</name>
<url>http://repo1.maven.org/maven2/</url>
<layout>default</layout>
</repository>
<repository>
<id>mulesoft-releases</id>
<name>MuleSoft Releases Repository</name>
<url>http://repository.mulesoft.org/releases/</url>
<layout>default</layout>
</repository>
</repositories>
<pluginRepositories>
<pluginRepository>
<id>mulesoft-release</id>
<name>mulesoft release repository</name>
<layout>default</layout>
<url>http://repository.mulesoft.org/releases/</url>
<snapshots>
<enabled>false</enabled>
</snapshots>
</pluginRepository>
<pluginRepository>
<id>mule-public</id>
<url>https://repository.mulesoft.org/nexus/content/repositories/releases</url>
</pluginRepository>
</pluginRepositories>

</project>
Jenkins Configuration
Now let's configure a Jenkins item for the application.
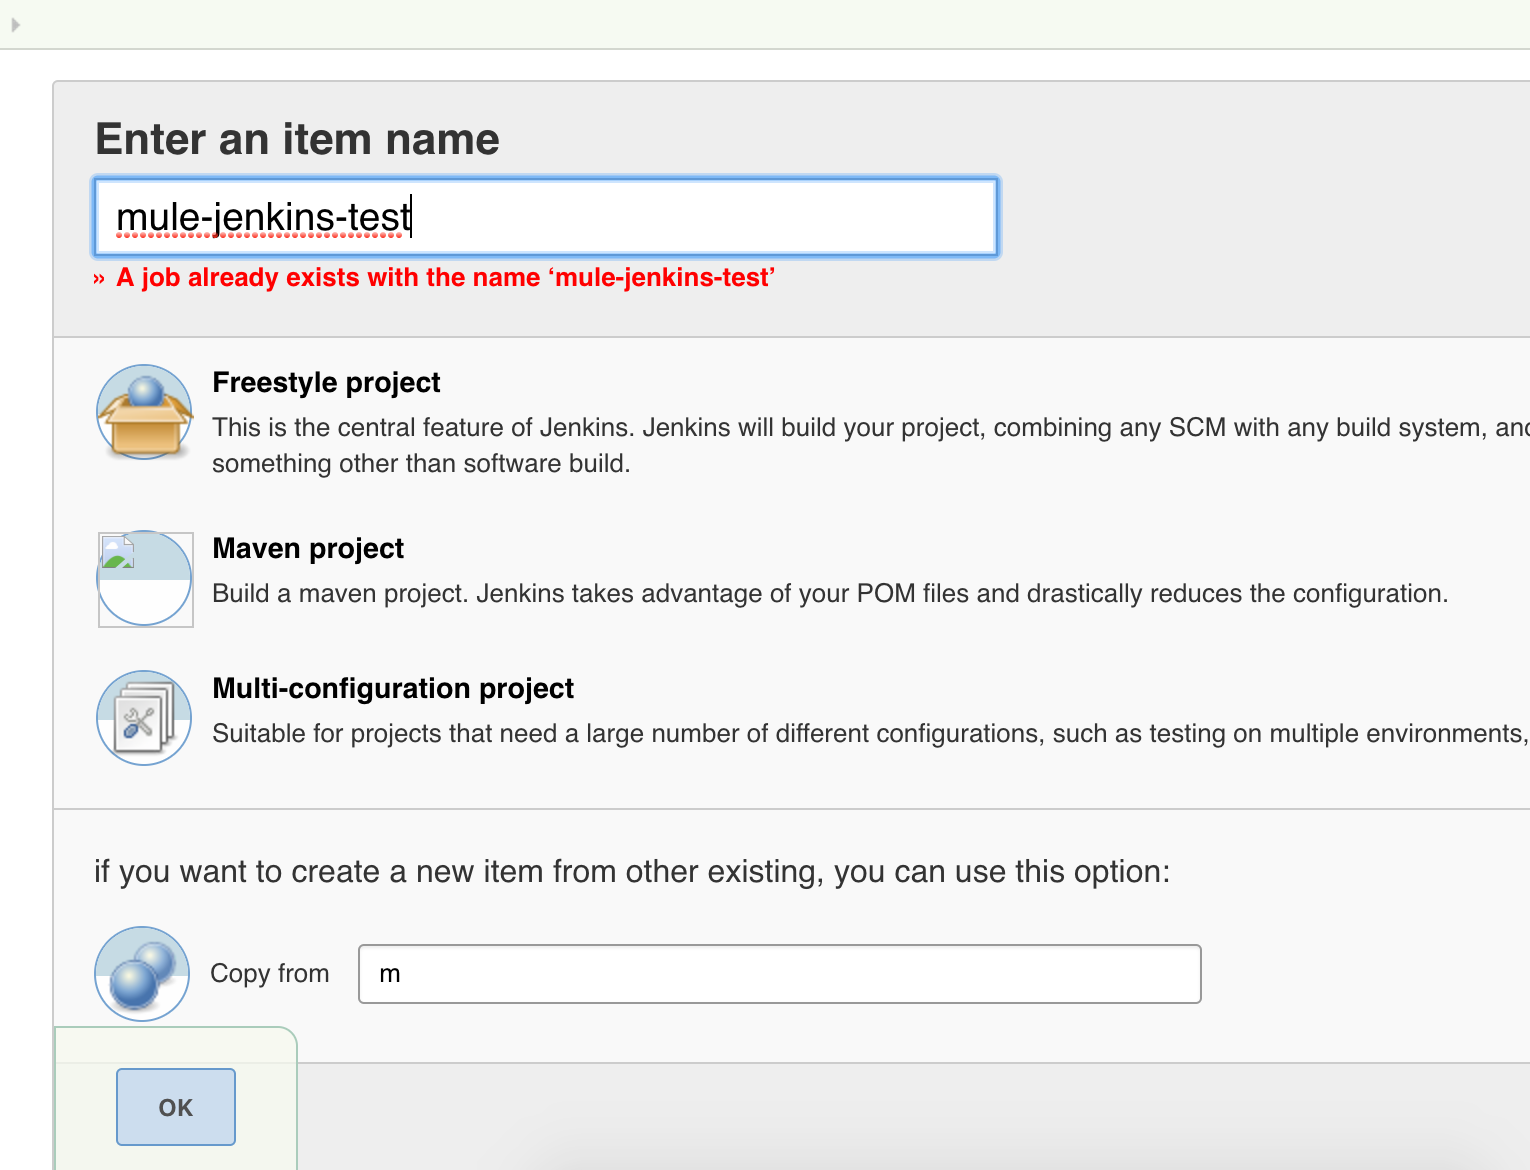
Create Item
Create a Maven project as shown below,
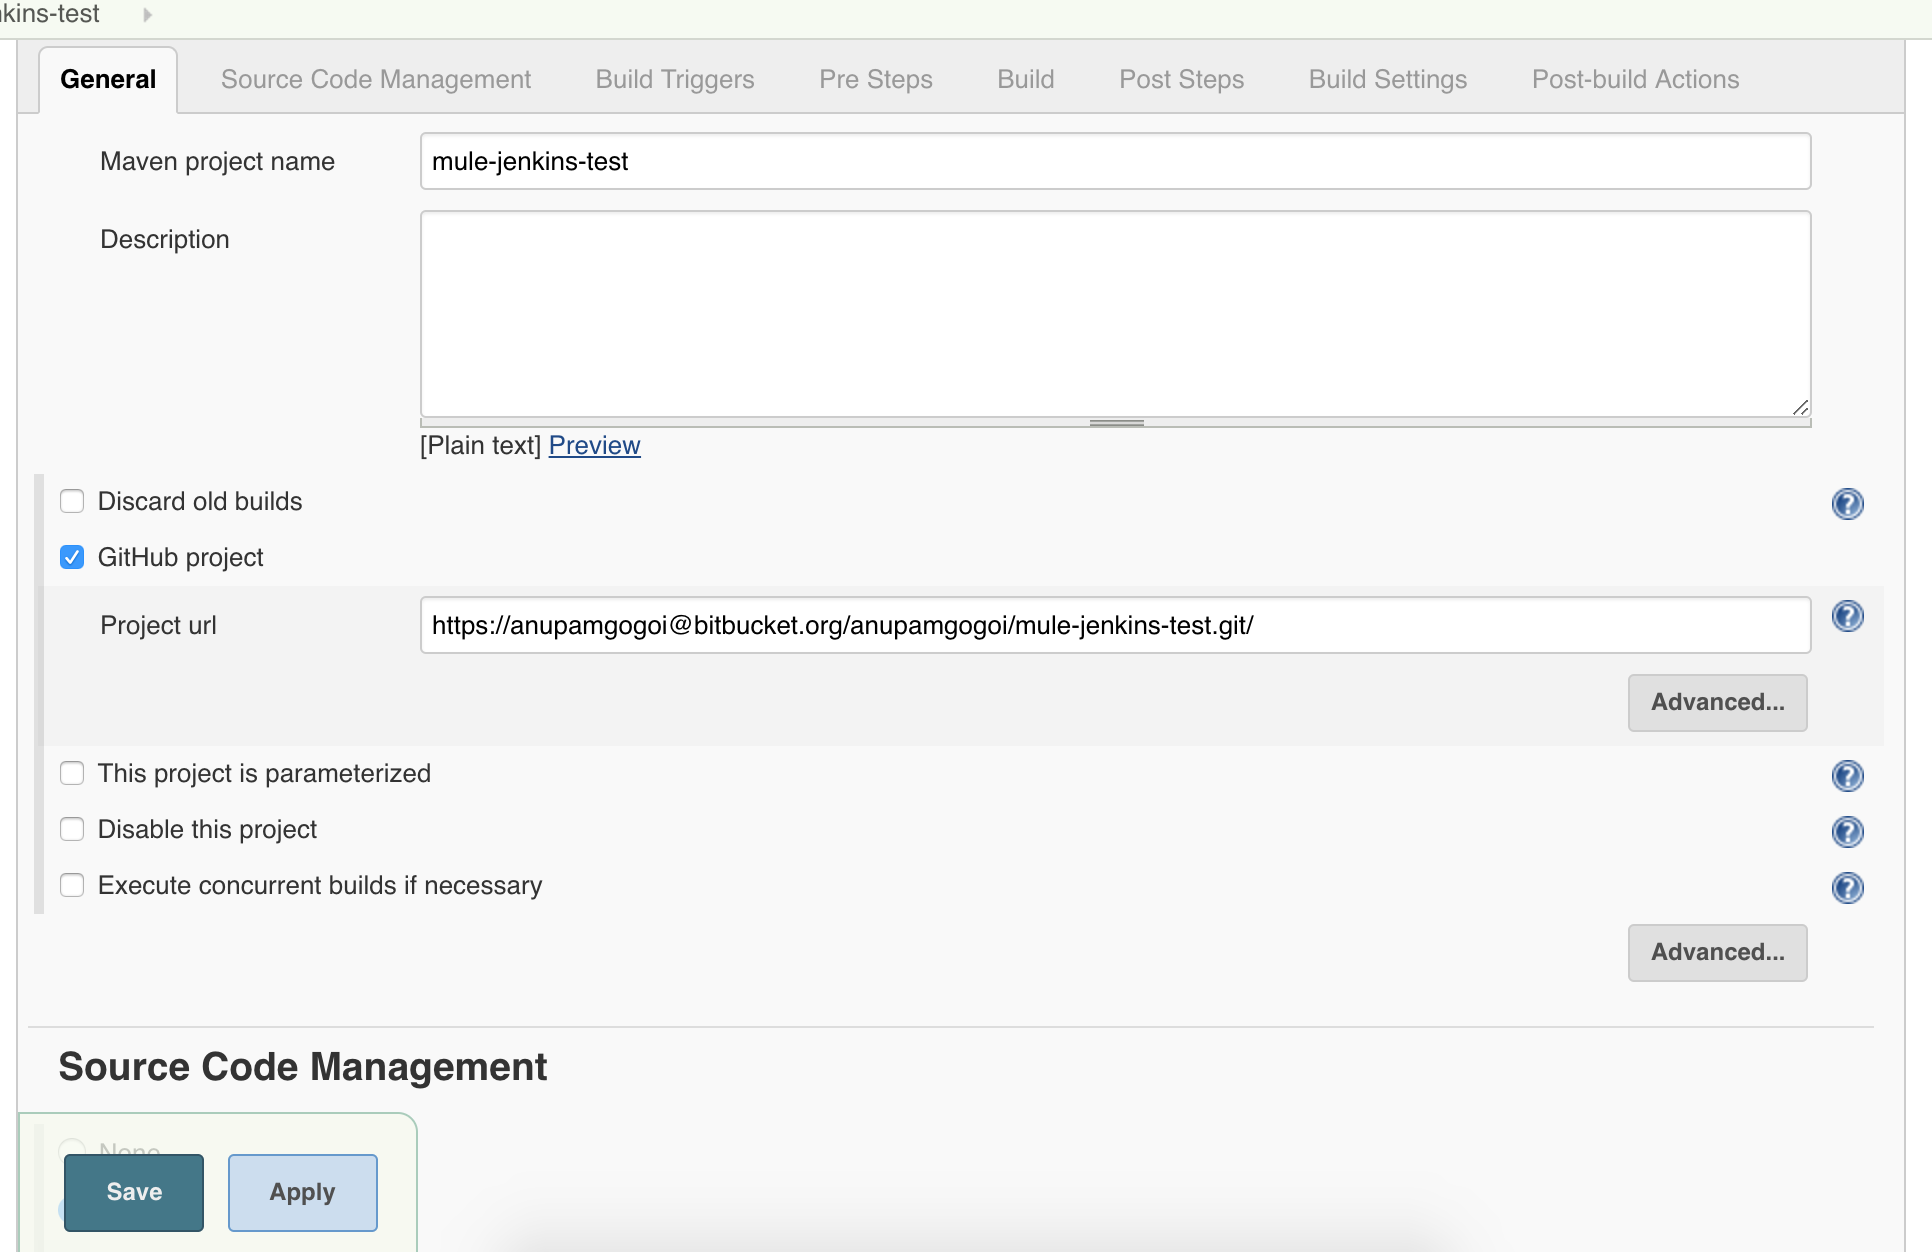
General
Let's configure our bitbucket in the General section.
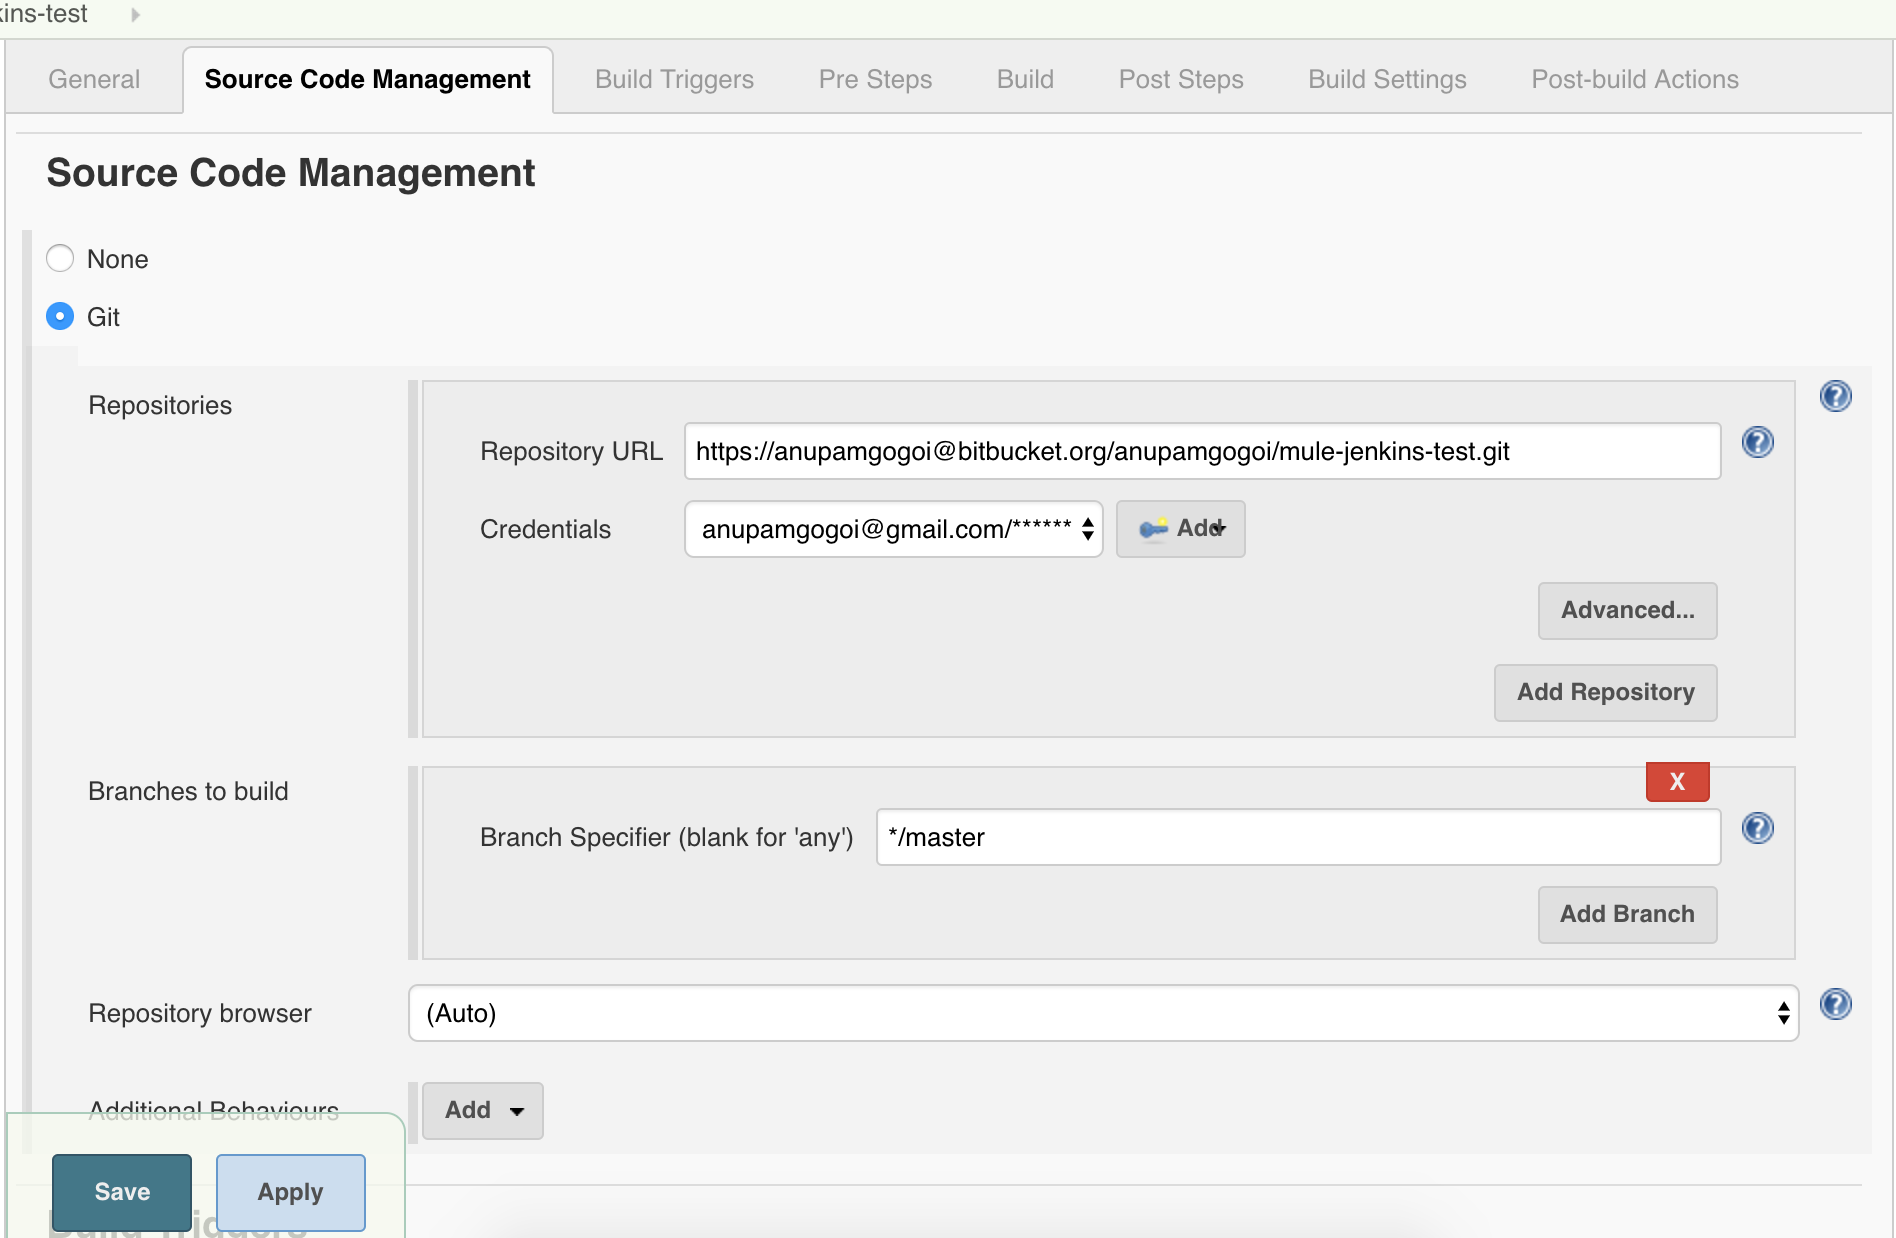
SCM
Provide the necessary credentials of bitbucket.
Build Triggers
Pre Steps
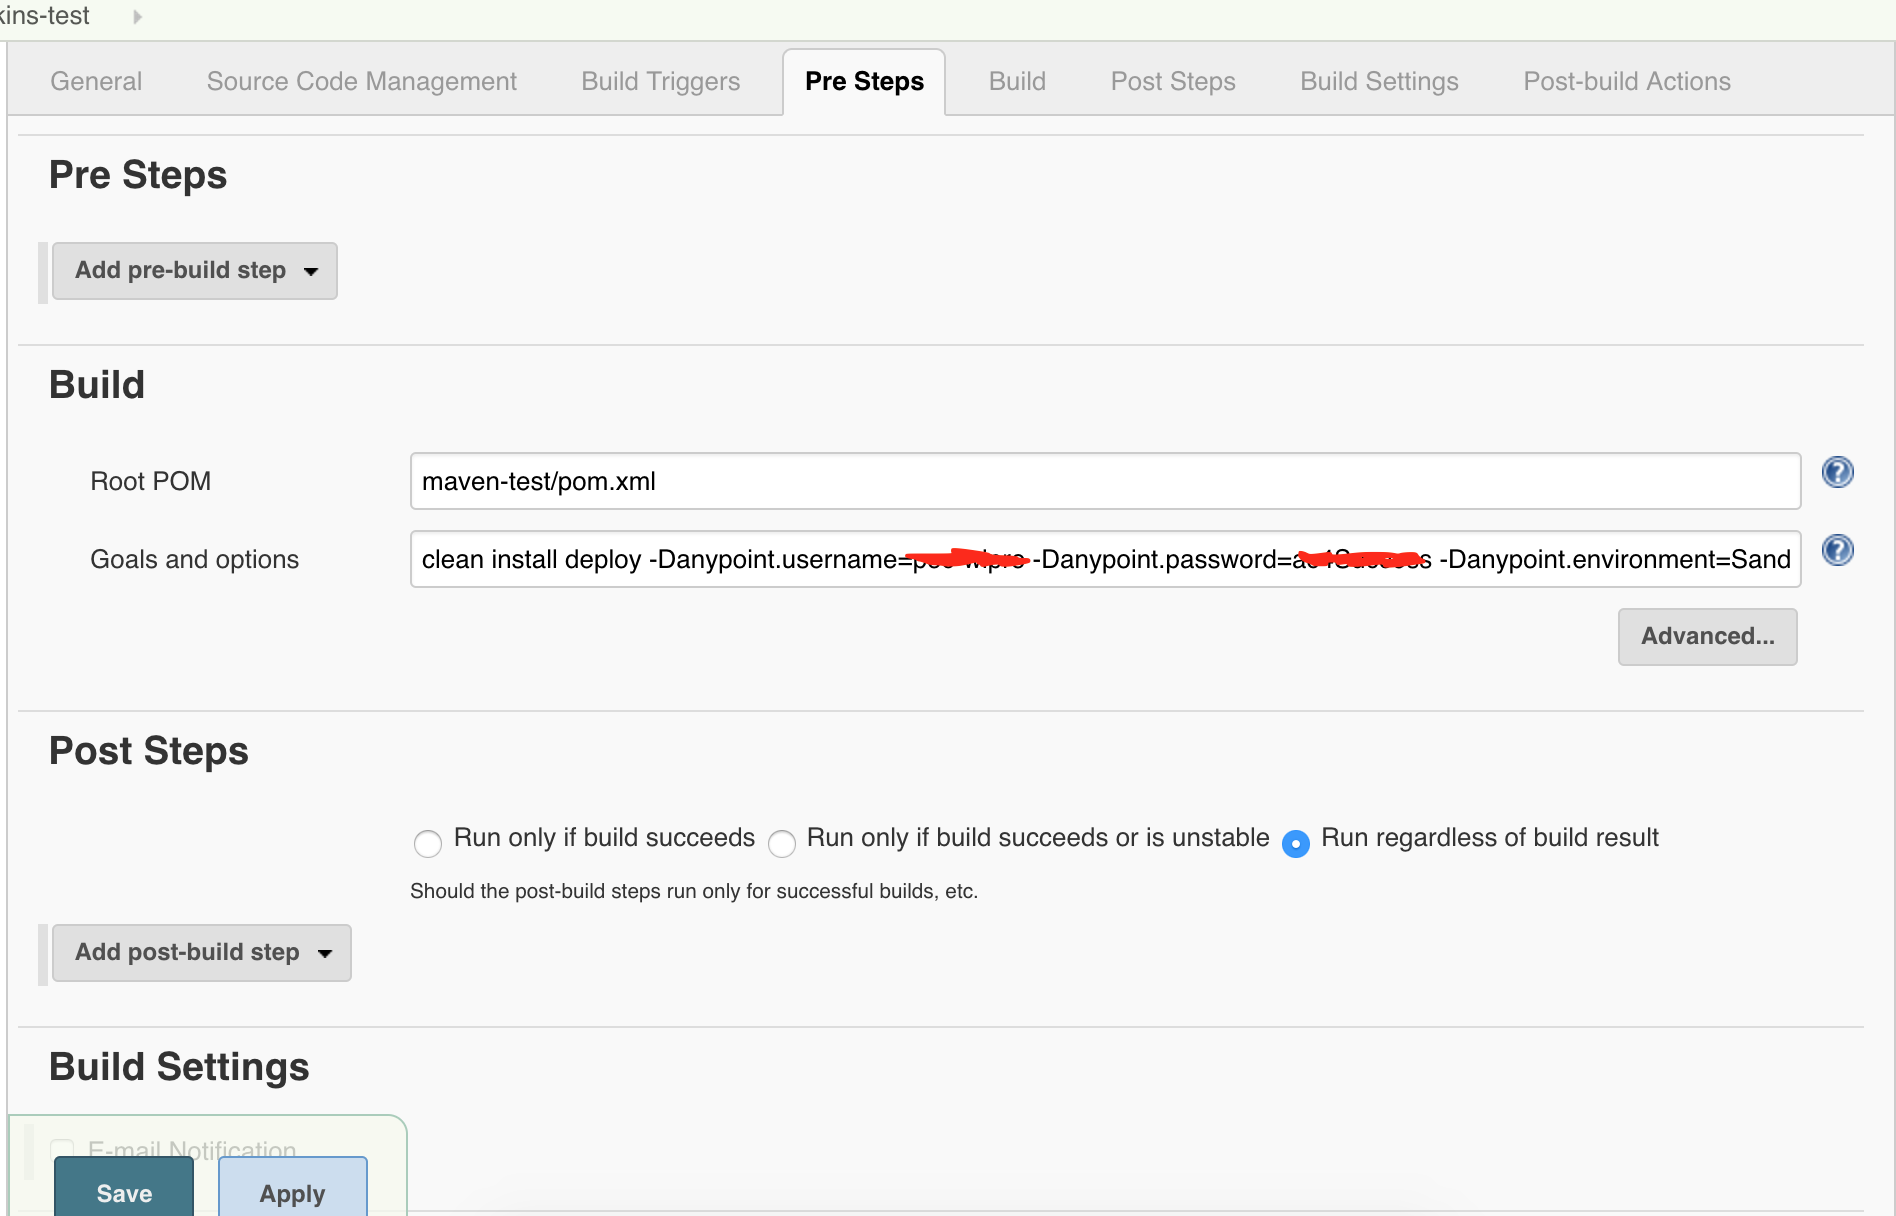
Note that the property values (starting with -D) that were defined in the pom.xml are being filled with proper values.
Test
Now make some changes in the code and do a commit. The Jenkins job will start automatically and the application will be deployed/redeployed in the Cloudhub.
Conclusion
In this article I have shown how to configure Jenkins for continuous deployment of Mule projects in Cloudhub. In the next article I am going to show how to do it in on-premise Mule Runtime.
Opinions expressed by DZone contributors are their own.
Comments